Tag: Card Games

Xenoblade Chronicles Definitive Edition How Long To Beat...
Xenoblade Chronicles Definitive Edition stands out as one of the most expansive Japanese role-playing games available on the Nintendo Switch. Players embarking on Shulk's journey across the massive titans Bionis and Mechonis often wonder how much time they need to commit. Understanding the overall story length and completion requirements helps gamers plan their playthrough effectively.
Main Story Length and Core Campaign
Focusing strictly on the main campaign of Xenoblade Chronicles Definitive Edition will take most players around 70 to 75 hours. Skipping side content allows you to experience the core narrative of Shulk and the Monado without unnecessary delays. However, maintaining a steady pace requires efficient combat strategy to avoid under-leveling against major bosses.
First-time players who engage in light exploration typically finish the story in roughly 80 hours. The campaign features numerous cinematic cutscenes, detailed plot twists, and multi-stage boss encounters that naturally extend overall playtime. Managing your party setup efficiently ensures a smooth journey through the main story arc.
Extra Content and Side Quests
For players who enjoy exploring every nook and cranny, the game offers hundreds of optional side quests and affinity challenges. Completing a moderate amount of side quests alongside the main story will easily push your total playtime to around 90 to 100 hours. Engaging with these activities unlocks valuable gear, unique gems, and useful character abilities.
Achieving full completion by finishing all side quests, defeating unique monsters, and rebuilding Colony 6 requires a massive time investment. Completionist playstyles regularly demand 135 to 150 hours of total gameplay. Exploring all regions and filling out the Collectopaedia adds significant replay value for dedicated fans.
Future Connected Expansion Playtime
The Definitive Edition includes an exclusive epilogue chapter titled Future Connected, which focuses on Melia and Shulk. This additional story mode takes approximately 10 to 12 hours to complete if you focus solely on its narrative. It offers a satisfying continuation of the lore while introducing fresh gameplay mechanics.
Players who choose to complete all side quests and track down every Nopon prospector within Future Connected can expect to spend around 15 to 20 hours. Because it is accessible directly from the main menu, players can jump into this content immediately or save it for after the main campaign.
Tips to Manage Playtime Efficiently
Utilizing quality-of-life enhancements introduced in the remaster can significantly streamline your overall completion time. Casual Mode allows players to breeze through difficult boss fights without grinding for experience points. Additionally, auto-run and improved quest markers make navigating the giant maps much faster.
Setting up your quest tracking carefully prevents unnecessary backtracking across giant titan zones. Expert Mode also gives you full control over character experience levels, letting you balance the game's difficulty to suit your preferred play speed.
Ark Survival Ascended Character Creation Tips And Customization...
Character creation in Ark Survival Ascended offers players an unprecedented level of visual control thanks to the upgraded Unreal Engine 5 technology. Designing your survivor is the first critical step before stepping foot onto the dangerous island, where identity and survival intersect. Understanding how to utilize these new customization tools effectively can elevate your overall gaming experience right from the start.
Exploring Detailed Facial and Body Sliders
The overhauled suite features granular sliders for nearly every aspect of your survivor's physical structure. Players can fine-tune bone proportions, facial features, and muscularity with much greater precision than in the original game. Adjusting these settings carefully ensures your character stands out unique in any multiplayer tribe.
Selecting Hair Types and Facial Grooming
Hair rendering has seen a massive upgrade, providing realistic textures and dynamic movement in environmental conditions. You can select from various hairstyles, facial hair options, and color palettes to fit your desired aesthetic. Experimenting with different shades allows for personalized combinations that reflect your survival style.
Practical Gameplay Considerations for Body Size
While extreme proportions can be entertaining, character dimensions can subtly impact practical gameplay and hitboxes. Smaller frames might make hiding in dense foliage easier during competitive PvP encounters. Conversely, larger models are easier to spot, so balancing personal preference with tactical gameplay is worth considering.
Saving Presets for Future Spawn Points
Once you design a survivor you love, taking advantage of the preset saving feature saves valuable time on future playthroughs. This tool allows players to instantly reapply custom visual designs when joining new servers or starting fresh sessions. It guarantees your iconic look remains consistent across different island adventures.

Where Is Ganon's Horse TOTK Location and Taming...
Finding unique mounts in The Legend of Zelda: Tears of the Kingdom adds a rewarding layer of exploration to Link's journey across Hyrule. Among these iconic steeds, the Giant Horse—often referred to as Ganon's Horse due to its massive dark build and vibrant orange mane—stands out as a powerful companion. Knowing where to locate this formidable creature and how to tame it efficiently will save you considerable time and effort during your adventure.
Where to Find Ganon's Horse in TOTK
Ganon's Horse is located along the coast southeast of Hateno Village, specifically around the grassy peninsula near Hateno Bay. To reach this area quickly, players can fast travel to the Hateno Ancient Tech Lab or Zanmik Shrine and glide down towards the shore. The giant mount is easy to spot from a distance because it dwarfs the surrounding wild horses grazing nearby.
Preparation and Stamina Requirements
Taming this massive steed requires preparation, as it possesses a wild temperament and consumes significant stamina when mounted. Players need more than two full wheels of stamina to successfully calm the horse. Preparing stamina-restoring meals or stealth-boosting elixirs before approaching makes the capture process much smoother and reduces the chance of being bucked off.
How to Tame and Catch the Giant Horse
Approach the horse slowly from the side or rear while remaining crouched to avoid startling nearby animals. Once the mount prompt appears, press the button to climb onto its back and immediately begin spamming the soothe button. Keep pressing soothe continuously until the horse calms down, consuming stamina items from your inventory if your meter runs low.
Registering the Mount at a Stable
After successfully taming the horse, you must ride it to a stable to register it and make it permanently yours. The closest option is Dueling Peaks Stable to the west, which requires riding along the main roads through East Necluda. Once registered, this powerful steed can knock down smaller enemies with ease, making it a valuable addition to your collection.

Where Is Ganon's Horse TOTK Location and Taming...
Finding unique mounts in The Legend of Zelda: Tears of the Kingdom adds a rewarding layer of exploration to Link's journey across Hyrule. Among these iconic steeds, the Giant Horse—often referred to as Ganon's Horse due to its massive dark build and vibrant orange mane—stands out as a powerful companion. Knowing where to locate this formidable creature and how to tame it efficiently will save you considerable time and effort during your adventure.
Where to Find Ganon's Horse in TOTK
Ganon's Horse is located along the coast southeast of Hateno Village, specifically around the grassy peninsula near Hateno Bay. To reach this area quickly, players can fast travel to the Hateno Ancient Tech Lab or Zanmik Shrine and glide down towards the shore. The giant mount is easy to spot from a distance because it dwarfs the surrounding wild horses grazing nearby.
Preparation and Stamina Requirements
Taming this massive steed requires preparation, as it possesses a wild temperament and consumes significant stamina when mounted. Players need more than two full wheels of stamina to successfully calm the horse. Preparing stamina-restoring meals or stealth-boosting elixirs before approaching makes the capture process much smoother and reduces the chance of being bucked off.
How to Tame and Catch the Giant Horse
Approach the horse slowly from the side or rear while remaining crouched to avoid startling nearby animals. Once the mount prompt appears, press the button to climb onto its back and immediately begin spamming the soothe button. Keep pressing soothe continuously until the horse calms down, consuming stamina items from your inventory if your meter runs low.
Registering the Mount at a Stable
After successfully taming the horse, you must ride it to a stable to register it and make it permanently yours. The closest option is Dueling Peaks Stable to the west, which requires riding along the main roads through East Necluda. Once registered, this powerful steed can knock down smaller enemies with ease, making it a valuable addition to your collection.

Destiny 2 Terminal Overload Key: How to Get...
Navigating the vibrant streets of Neomuna in Destiny 2 presents players with continuous action, high-level combat, and lucrative loot opportunities. Among the most rewarding public activities available on the destination is Terminal Overload, which culminates in a dual-chest reward system upon defeating the final boss. To access the most valuable rewards inside the bonus chest, Guardians need to acquire specific consumables known as Terminal Overload Keys.
Unlocking Access to Terminal Overload Keys
Before players can start earning these essential keys, they must first complete the main Lightfall campaign story. Following the campaign, Guardians need to finish the post-story quest titled Welcome to the Hall of Heroes to unlock further regional tasks. Completing this sequence opens up the Stargazer quest from Quinn Laghari, which directly introduces players to the key acquisition mechanics.
Methods for Farming Keys on Neomuna
Once the prerequisite quests are completed, Terminal Overload Keys can drop naturally while participating in activities across Neomuna. Engaging in public events, opening scattered world chests, and completing local patrols are reliable ways to earn keys. Additionally, players who reach rank 13 with Nimbus can pick up a daily bounty that guarantees a key upon completion.
How to Use Keys for Exclusive Rewards
At the end of a successful Terminal Overload activity, two distinct reward chests will spawn near the arena. While the standard chest is free for all participants to open, the second locked chest requires spending one key. Opening this bonus chest guarantees higher-tier Neomuna weapons and valuable gear drops that rotate on a daily schedule.
Managing Inventory and Key Storage
Guardians should keep in mind that Terminal Overload Keys have a maximum inventory stack limit of five. Because excess keys will not accumulate beyond this threshold, it is best to spend them regularly during public event runs. Consistently clearing your inventory allows you to keep farming patrol zones efficiently without missing out on new key drops.

The Finals Best Medium Build For Competitive Multiplayer...
In the fast-paced competitive environment of The Finals, selecting the right setup for the Medium class can completely dictate the flow of a tournament match. The Medium build serves as the crucial backbone of any balanced team, offering a perfect mix of firepower, squad support, and map mobility. Mastering this setup allows players to sustain their teammates during intense cashout defense while maintaining solid dueling potential against opposing squads.
Selecting the Ideal Specialization for Team Support
The Healing Beam remains the absolute staple specialization for a competitive Medium build. It provides continuous health regeneration that allows Heavy and Light allies to remain in firefights significantly longer. A well-timed heal can instantly turn the tide of a high-stakes cashout battle.
While the Dematerializer offers creative traversal, the raw utility of keeping your team alive far outweighs niche wall-phasing plays in organized ranked play. Maintaining high team health ensures your squad retains map pressure and avoids long respawn timers. Consistent support creates a reliable foundation for victory in every round.
Optimal Weapon Choices for Mid-Range Control
The FCAR assault rifle continues to dominate competitive loadouts due to its exceptional precision and manageable recoil pattern. Although its magazine capacity is relatively modest, its high damage per shot rewards players with precise aim. It excels at dropping targets quickly before they can find cover.
For players who prefer sustained fire, the AKM presents a reliable alternative with a larger magazine. It allows for better crowd control when multiple opponents push a single choke point. Both options ensure that the Medium build can hold its own in direct gunfights.
Essential Gadgets for Map Utility and Revives
The Defibrillator is a non-negotiable gadget choice for any serious Medium contestant. Instantly reviving a fallen teammate mid-fight prevents squad wipes and maintains numbers advantage. Pairing it with the Jump Pad gives your team vital verticality to capture high ground instantly.
To round out the kit, bringing APS Turrets or Explosive Mines offers great defensive capabilities around cashout stations. APS Turrets protect your squad from incoming grenade spam and RPG projectiles. This gadget combination balances offensive mobility with defensive stability.
Combat Strategy and Positioning Guidelines
Playing the Medium build effectively requires strong situational awareness and disciplined positioning behind primary frontline fighters. You should always position yourself slightly behind your Heavy teammate to provide consistent healing cover. Avoid initiating isolated 1v1 fights away from your objective and allies.
Communication is essential when coordinating revives and deploying mobility tools for team rotations. Always deploy your Jump Pad ahead of time to plan clear exit or entry routes. Consistent team play will consistently carry your squad through competitive tournaments.

Red Dead Redemption 2 Cover Art And The...
When Rockstar Games revealed the cover art for Red Dead Redemption 2, it instantly captivated gamers around the globe. The bold imagery captured the gritty essence of the American frontier while establishing a powerful visual identity for the game. This striking artwork remains one of the most recognizable designs in modern video game history.
The Bold Color Palette and Visual Contrast
The crimson background serves as the defining element of the box art, immediately drawing the viewer's eye and setting a dramatic tone. By utilizing high-contrast black silhouettes against vibrant red hues, the designers created an intense atmospheric backdrop. This intentional visual choice symbolizes both the bloody reality of outlaw life and the fading era of the Wild West.
In addition to creating strong brand recognition on store shelves, the red hue evokes feelings of danger, urgency, and passion. The bright backdrop makes the dark foreground elements pop, ensuring that every detail stands out clearly. This striking color scheme became an essential cornerstone of the game's global marketing campaign.
Arthur Morgan as the Central Focal Point
Positioned front and center, protagonist Arthur Morgan dominates the composition with a steady, resolute stance. Holding his revolver ready, his framed posture communicates both inner tension and seasoned survival skills. His iconic hat and weathered clothing ground the character in historical realism, giving players an immediate sense of his rugged personality.
Unlike traditional action covers that feature chaotic explosions or complex backgrounds, this portrait relies on emotional weight and character presence. Arthur's firm gaze reflects the moral ambiguity and personal struggles he faces throughout the narrative. By focusing heavily on his lone figure, the artwork establishes Arthur as the emotional anchor of the entire experience.
Silhouettes of the Van der Linde Gang
Below the central portrait, seven distinct figures ride across the horizon beneath a low-hanging sun. These silhouettes represent the core members of the Van der Linde gang, emphasizing brotherhood, loyalty, and a shared destiny. The sweeping composition subtly reminds players that Arthur's personal journey is deeply tied to the fate of his outlaw family.
The placement of these riders along the bottom edge creates a sense of continuous motion and grand scale. It hints at the expansive open world awaiting players and the frequent journeys across dangerous territories. This group dynamic balances Arthur's solo focus, illustrating the collective spirit of the gang.
Typography and Classic Western Branding
The distinctive distressed font used for the title reinforces the rugged aesthetic of the late nineteenth century. Classic block lettering paired with weathered textures gives the logo an authentic, vintage feel that aligns perfectly with the time period. The bold red Roman numeral two seamlessly integrates into the title layout without cluttering the visual space.
Every branding decision was crafted to feel cohesive with previous Rockstar titles while maintaining its own distinct identity. The clean arrangement of text at the base ensures that the artwork remains uncluttered and striking. This thoughtful graphic design helps the cover art feel timeless rather than overly busy.
The Lasting Legacy of the Design
The cover design successfully communicated the game's core narrative themes long before players ever stepped into its vast world. Its minimalist yet powerful approach proved that simple graphic choices can convey deep emotion, danger, and narrative depth. The design continues to inspire visual artists and remains a benchmark for cover art in the gaming industry.
Ultimately, the box art for Red Dead Redemption 2 succeeded because it captured an entire genre's spirit in a single image. Fans worldwide immediately associate that iconic red silhouette with an unforgettable epic story. It stands as a testament to the power of deliberate visual storytelling in modern entertainment.

Fallout 76 Dolly Sods Location And Complete Area...
The untamed wilderness of the Mire holds many secrets for seasoned wasteland explorers navigating Appalachia. Among these treacherous locations, the Dolly Sods Wilderness stands out as a unique biotope filled with distinct environmental hazards and valuable resources. Understanding this area is essential for surviving the mutated wildlife and completing high-reward daily quests.
Finding Dolly Sods Campground and Wilderness
To locate this rustic campground, players must travel to the northernmost section of the Mire region. It sits directly east of the isolated pumpkin house and slightly north of the Crevasse Dam landmark. The area is split into two primary zones known as the campground cabins and the expansive wilderness plateau.
Arriving at the destination reveals a collection of dilapidated wooden structures surrounded by dense pine forests. Navigating the rocky cliffs can be challenging due to low visibility and sudden steep drops. Adventurers should approach from the western roads to avoid getting ambushed by cloaked monsters lurking near the riverbanks.
Key Quests and Wilderness Activities
The primary reason many dwellers visit this location is to trigger the famous Stings and Things daily quest. Speaking with Scout Leader Treadly unlocks this repeatable mission, which tasks players with harvesting various insect parts across the map. Completing this chore is a reliable method for earning valuable Possum Badges and rare crafting ingredients.
Beyond the daily duties, the site serves as a prime hunting ground for cryptids and rare flora. Toxic soot flowers and mutated fern plants grow abundantly throughout the damp marshlands. Collectors frequently visit these highlands to stock up on brewing materials and cooking components.
Enemies and Survival Hazards
The local wildlife in this elevated region is exceptionally hostile and scales to higher levels quickly. Players frequently encounter aggressive Yao Guai bears protecting the main campsite clearings. Giant ticks, bloodbugs, and radscorpions also spawn regularly near the stagnant water pools scattered across the plateau.
Environmental radiation is another major factor that travelers must prepare for before exploring. The shallow streams and muddy bogs emit constant toxic fumes that can quickly degrade your health bar. Wearing protective armor or consuming rad-resistant consumables is highly recommended for extended harvesting sessions.
Notable Loot and Resource Nodes
Scavenging inside the main cabins yields a decent amount of loose screws, aluminum canisters, and premium cooking recipes. The master cabin often contains a Bobblehead spawn point sitting on the wooden fireplace mantle. Checking the outdoor picnic tables can also reveal hidden caps stashes and discarded ammunition boxes.
For players interested in long-term resource extraction, the nearby wilderness workshop can be claimed for passive income. This adjacent zone features multiple mineral deposits including gold nodes, wood piles, and clean water sources. Defending this workshop from waves of scorched enemies provides additional plans and rare modifications.

Red Mask Sons Of The Forest Location And...
Surviving the cannibal-infested island in Sons of the Forest requires utilizing every defensive tool at your disposal to avoid unnecessary combat. Among the most unique utility items available is the Red Mask, a printable piece of equipment that allows you to trick certain local threats. Understanding how to acquire this protective tool and knowing its severe operational limits can significantly increase your lifespan during exploration.
Locating the Necessary 3D Printers
To obtain the Red Mask, survivors must locate one of the hidden underground bunkers scattered across the island that house a functional 3D Printer. The easiest machine to reach is situated within a cave system on the western portion of the map, identifiable by a pulsing green point of interest near an overgrown golf cart. Exploring this cavern allows you to access the printer room safely without needing advanced tools to break through the entrance.
Alternatively, two other printer locations exist but require players to possess the Shovel before they can be accessed. One of these buried bunkers sits on the right side of a river between the northern beach and the snowy mountains, while the other rests in the southwestern region. Digging up the dirt piles at these specific coordinates reveals hidden hatches that lead directly to the underground crafting rooms.
Crafting the Red Mask with Printing Resin
Once you successfully stand before a 3D Printer, you will need to spend 150ml of Printing Resin to manufacture the item. This essential chemical resource can frequently be found scattered across the nearby bunker shelves or inside random supply crates on the surface. Approaching the connected laptop allows you to cycle through the available blueprints until the digital mask schematic appears on the screen.
Interacting with the laptop initiates a brief fifteen-second printing process that physically forms the utility tool in the collection tray. After the machine finishes its mechanical cycle, you can pick up the freshly made item to place it permanently into your inventory. Keeping extra resin stored in your primary backpack ensures that you can always replace or craft other high-tech gear when visiting these bunkers later.
How to Use the Disguise Effectively
To utilize the protective properties of the Red Mask, you must first equip it from the upper left portion of your inventory mat. Simply holding the item in your hand does nothing, meaning you must actively hold down the secondary action button to bring it up to your face. This defensive posture mimics the appearance of larger island entities to placate nearby threats.
The absolute golden rule of this item is that you must raise the mask before any cannibals spot your true identity. If an enemy catches sight of your face for even a single millisecond without the disguise, the trick fails completely and they will attack. Furthermore, you cannot perform aggressive actions, pick up scattered resources, or wield weapons while maintaining this defensive facial coverage.
Understanding the Limitations of the Disguise
While the item works wonderfully for slipping past low-tier patrols or quietly looting peaceful villages, it is far from a perfect defensive solution. If you have a violent history of slaying tribe members on the island, local groups will remain hostile regardless of your facial wear. Standing too close to large groups for extended periods will also raise suspicions and trigger sudden combat encounters.
Most importantly, elite enemies and underground mutants completely ignore the psychological effects of the basic crimson design. High-tier threats wearing golden face protection will immediately recognize your disguise and initiate an aggressive assault upon contact. For absolute protection against those advanced tribesmen, players must eventually seek out the authentic Golden Mask hidden deep within the southeastern morgue bunker.

how to get your steam trade link Complete...
Trading in-game items on Steam is a fantastic way to customize your gaming experience, whether you collect Counter-Strike skins or Dota 2 cosmetics. To swap items smoothly with other users or utilize external marketplaces, you need a specific personal connection called a trade URL. Knowing how to get your steam trade link safely unlocks a massive ecosystem of item swapping and secondary inventory management without any hassle.
Finding Your URL on the Desktop Client
Locating your personal link using the Steam desktop application or a regular computer browser takes only a few simple clicks. First, open the program and hover over your profile name at the very top of the interface before selecting the inventory option. From your main inventory window, find and click the prominent blue button labeled trade offers on the right side.
Next, look for a menu link on the right side of the screen called who can send me trade offers and click it. Scroll down to the bottom section until you spot the area dedicated to third-party web platforms. Your unique address will be fully visible right there, allowing you to quickly capture the text for your external trading needs.
Accessing Your Link on the Mobile App
If you prefer using your smartphone, the process remains highly straightforward and accessible directly through the official phone application. Start by launching the application on your mobile device and tap your unique user icon located in the upper right corner. From the navigation listing that appears, choose your inventory and then tap the trade offers options header immediately.
Tap the menu icon on the right side and select the exact same permission header regarding who can interact with your offers. Scroll toward the bottom until you locate the identical third-party websites area to view your link text. You can copy the entire string straight to your mobile clipboard to share with your friends or external platforms instantly.
Important Privacy and Safety Settings
Before you begin distributing your newly found link, you must double-check that your profile permissions allow other users to interact with you. Your inventory must be set entirely to public inside your settings, or external trade requests will automatically fail to process. Anyone can securely send you an item offer using this specific text address, but they cannot force a transaction without your manual approval.
Keep in mind that generating a fresh address will immediately invalidate any previous combinations you shared across public discussion forums. If you ever feel like you are receiving too many automated messages, simply clicking the reset button will instantly protect your profile from old links. Always remain vigilant and thoroughly verify every item package before officially confirming any trade sequence on your authentication device.

testament of sherlock holmes walkthrough Complete Story Walkthrough...
The Testament of Sherlock Holmes presents a dark and complex narrative that challenges even the most seasoned investigators. As the legendary detective faces public doubt and a mounting conspiracy, navigating through the intricate crime scenes requires keen observation and precise logic. This comprehensive guide provides step-by-step solutions to help you uncover the truth behind London's most sinister mysteries.
Investigating the Initial Crime Scenes and Gathering Evidence
Your journey begins with a meticulous search for clues at the prominent murder scenes scattered across the city. Using Sherlock's unique sixth sense feature helps highlight small, easily missed objects like hidden documents and scrap material. Inspecting every interactive element carefully ensures that your deduction board remains updated with necessary information.
As you progress through the gloomy streets, analyzing physical evidence under the microscope reveals hidden chemical properties and unexpected connections. Dr. Watson provides critical support during these segments, often shifting the perspective to help access restricted areas. Keeping a detailed log of character testimonies will prove invaluable when sorting through contradictory statements later on.
Solving Complex Deduction Boards and Logic Puzzles
The core gameplay mechanism revolves around linking established facts together on the interactive deduction board. Incorrectly matching clues will stall your progression, so it is vital to review the sequence of events chronologically before making a final decision. When a breakthrough is achieved, new dialogue paths and travel locations open automatically on your map.
Mechanical puzzles throughout the adventure demand patience and an understanding of traditional locks and gear systems. For instance, safe combinations often require deciphering cryptic riddles found in nearby diaries or ledger entries. If you find yourself stuck on a specific board alignment, resetting the puzzle entirely can offer a fresh perspective on the solution.
Navigating Late Game Conspiracies and Final Revelations
The final chapters elevate the tension as Holmes himself becomes a prime suspect in a massive web of deception. Exploring the hazardous environments in these acts requires caution, as making the wrong dialogue choice can result in an immediate failure state. It is highly recommended to save your game frequently before engaging in major confrontations.
Piecing together the final conspiracy reveals the true mastermind behind the elaborate plot that threatened the detective's reputation. By utilizing the step-by-step methods outlined in this guide, you can successfully navigate the final puzzles and experience the dramatic conclusion to this dark tale. Maintaining analytical objectivity remains your strongest tool until the very last puzzle is solved.

How to Create a VTuber Model From Scratch...
The rise of virtual content creators has sparked immense interest in the digital world, drawing many newcomers to the art of virtual storytelling. Creating your own unique avatar allows you to build a personalized brand without revealing your real identity. Learning how to design and build an avatar from the ground up provides complete creative control over your virtual presentation.
Designing Your Character Concept
Every successful avatar begins with a clear creative vision and design concept before any technical building starts. Beginners should focus on choosing a distinct color scheme and overall aesthetic that matches their intended streaming style. Sketching your ideas on paper or using digital software helps visualize how the final character will look to your audience.
It is important to plan how different parts of the character will move once the digital configuration begins. Deciding between a classic two-dimensional look or a fully modeled three-dimensional structure will determine the type of software you need later. Keeping the initial design clean and simple makes the upcoming preparation steps much more manageable for a beginner.
Preparing Artwork for Separation
If you choose to build a two-dimensional character, your digital illustration must be drawn in a highly specific structural layout. Every moving part, including individual eye pieces, hair strands, and clothing joints, must reside on its own independent layer. This thorough separation allows specialized software to manipulate the illustration elements smoothly during movement tests.
Properly labeling each drawing layer ensures you can easily identify facial features and limbs during the configuration process. High-resolution digital canvases are highly recommended to keep the visual quality crisp when zooming in on fine details. Once the illustration layers are finalized, the project file can be exported into standard industry design tools.
Rigging and Articulating the Model
Rigging is the critical phase where a static illustration is transformed into an animated puppet capable of real-time expression. This technical step involves placing digital bones, parameters, and deformation grids over your separated artwork layers. Beginners can utilize free or accessible tools to establish basic eye blinking, mouth movements, and breathing loops.
Setting up tracking parameters allows the software to translate your physical facial expressions directly onto the digital avatar. Testing your physics settings ensures that components like long hair or dangling accessories sway naturally with motion. Spending time refining these parameters creates a highly responsive character that feels alive during live interactions.
Connecting to Motion Tracking Software
The final phase of the creation process involves linking your finished model file with live camera tracking tools. Standard webcams or smartphone cameras are perfectly capable of tracking your expressions and head movements accurately. Fine-tuning the software calibration helps eliminate unwanted jittering and ensures smooth transitions during dynamic movements.
Integrating the camera output with your preferred broadcasting tools completes the entire production pipeline. Beginners should conduct multiple private test recordings to ensure the avatar responds well to sudden lighting changes. With a completed setup, you are fully prepared to share your unique digital persona with viewers around the globe.

Conan Exiles All Armor Sets Locations and Crafting...
Conan Exiles drops players into a brutal open world where survival depends heavily on your choice of protective gear. Understanding how to navigate the expansive armor system is crucial for both mitigating damage and gaining massive attribute bonuses. This comprehensive guide breaks down the essential tiers of gear, where to find hidden recipes, and how to master the crafting benches.
Understanding the Three Core Armor Tiers
Protective gear in the Exiled Lands is divided into light, medium, and heavy categories to fit different playstyles. Light armor offers superior mobility and stamina management for agile warriors or sorcerers who prefer dodging attacks. Medium options balance physical protection with decent movement, while heavy sets transform players into ultimate tanks at the expense of speed.
As you progress, upgrading your tier from standard gear to epic quality becomes your top priority. Epic sets require specialized components like perfected padding and offer immense attribute upgrades to health, stamina, or weapon damage. Investing in the right weight category ensures your character remains highly effective during deadly encounters.
Locating Hidden Armor Recipes and Knowledge
While basic outfits can be unlocked directly through your feat menu, the most powerful endgame gear requires exploring dangerous locations. Unique blueprints are scattered throughout the open world, often locked behind hidden journals or boss drops. For example, legendary sets like the Armor of the Arena Champion and Godbreaker Armor require retrieving knowledge from the treacherous Warmaker Sanctuary.
Other sought-after variations require hunting specific bosses across the map to secure their crafting secrets. The Khari Overseer armor scroll can drop from Thag within the Wine Cellar dungeon, offering incredible stamina bonuses. Exploration is highly rewarded, so checking ancient ruins and deep caves is necessary to complete your blueprint collection.
Mastering the Armorer Bench and Crafting Process
To construct your newly discovered blueprints, establishing a functional crafting pipeline at your home base is necessary. Standard armorer benches handle early game gear, but crafting high-tier epic equipment requires an Improved, Campaign, or Garrison Armorer Bench. Processing raw animal hides into leather using a tannery provides the baseline resources needed for construction.
Capturing and employing skilled Thralls at your workstations will drastically optimize your resource usage and item stats. A Tier 4 Armorer Thrall increases base defense values, reduces overall weight, or boosts item durability depending on their specialization. Combining high-grade benches with legendary thralls allows you to forge the absolute best protection available in Conan Exiles.

How to Break Bones in Dreamlight Valley Quest...
Disney Dreamlight Valley offers players a magical blend of life simulation and adventure, but it also features unique obstacles that block progression across various biomes. One of the most prominent nuisances is the collection of large wildebeest bones scattered throughout the Sunlit Plateau, restricting access to crucial areas. To clear these path-blocking remains, players must complete a specific questline that upgrades their trusty Royal Shovel.
How to Unlock the Breaking Bones Quest
Before you can begin smashing the obstacles in the Sunlit Plateau, you must first bring the iconic villain Scar to your valley. This requires progressing through the main story until you unlock the Sunlit Plateau biome using your accumulated Dreamlight. Once Scar is settled in his giant skull home, you need to increase your friendship level with him to unlock the quest titled Breaking Bones.
This critical mission serves as the primary gateway to upgrading your tools for better exploration. Completing earlier tasks for the Pride Lands ruler ensures he will eventually share the secret of modifying your royal implements. Keeping a steady stream of daily discussions and favorite gifts flowing to Scar will speed up this prerequisite phase significantly.
Gathering Materials for the Shovel Upgrade
Once the quest begins, Scar will instruct you to gather specific rare materials from around the valley to craft a special enchantment. You will need to collect several pieces of Iron Ore, which can be found by mining rock nodes in biomes like the Glade of Trust or the Forest of Valor. Additionally, you must locate specific pristine bones hidden within the Sunlit Plateau itself to serve as the magical catalyst.
The recipe also calls for a certain amount of Dream Dust or local crafting elements that Scar specifies during your conversation. Managing your inventory properly during this phase will save you multiple trips across different regions. After gathering all the required components, head to the nearest crafting station located in the valley to assemble the upgraded shovel head attachment.
Upgrading Your Royal Shovel Tool
With the newly crafted enchantment in your possession, access your inventory to apply the modification directly to your Royal Shovel. This instantly transforms your basic digging tool into a powerful implement capable of shattering the smaller skeletal debris. You can test your new capabilities immediately by approaching the smaller bone structures blocking the wooden bridge in the Sunlit Plateau.
Simply interact with the targeted debris using your newly empowered tool to dissolve the blockage into usable resources like clay. This initial upgrade provides an excellent way to clear out cluttered pathways and gather essential materials for other village projects. However, a second upgrade from Scar will eventually be required later in his storyline to destroy the largest structures in the region.
Clearing the Sunlit Plateau Pathways
Removing these stubborn blockages allows you to explore the western half of the Sunlit Plateau without relying on fast-travel tricks. For those interested in tracking their global gaming accomplishments outside of the valley, managing your setup through a digital platform like Steam helps monitor your completion milestones. Clearing the pathways completely makes foraging for local ingredients and locating hidden treasure chests a much more efficient process.
As you continue helping the villainous lion with his regional ambitions, your fully upgraded shovel remains a permanent asset to your toolkit. Keeping your biomes clean not only improves the overall aesthetic of your valley but also ensures future character updates will not find you trapped behind old obstacles. Embrace the magical progression and enjoy your newly opened pathways across the Sunlit Plateau.

Where Is the Subway Office RE3 Location and...
Navigating the chaotic, zombie-infested streets of Raccoon City in the Resident Evil 3 remake can be an overwhelming experience for both newcomers and returning veterans. One of the most critical early-game locations you must locate is the Subway Office, a central hub required to progress the main storyline. Understanding how to find this building and safely access its interior ensures you can complete your objectives without wasting precious ammunition or health resources.
Locating the Subway Office in Downtown Raccoon City
The Subway Office is situated in the northern portion of the Downtown district, nestled away from the main burning alleyways. To reach it, players must navigate past the initial barricades and find the pathway leading towards the Kite Bros Railway building. The exterior is recognizable by its corporate signage and the large glass windows facing the main street area.
Before you can safely enter, you will need to clear out or circumvent several wandering undead that patrol the immediate vicinity. Planning your approach carefully prevents you from getting cornered in the narrow alley leading to the front entrance. Once inside the main structure, you will find a much-needed respite from the constant dangers lurking outside.
Gaining Access and Overcoming Early Obstacles
Accessing the building requires a bit of environmental puzzle-solving and backtracking through the burning streets. Initially, a massive fire blocks the direct path, forcing Jill Valentine to find a fire hose to extinguish the flames. This item is typically found in the nearby mechanic's shop, which requires careful navigation to reach.
Once the fire is put out, the path directly connects the main street to the alleyway leading straight into the corporate offices. Inside, you will encounter a safe room area where you can manage your inventory and save your progress. Taking a moment to organize your gear here is highly recommended before diving deeper into the facility.
Navigating the Interior and Main Objectives
The primary reason for visiting this location is to interact with the control panel that manages the city's subway lines. Jill must input the correct route configurations to bring the trains back online so survivors can escape the city. This puzzle requires you to analyze the terminal codes and cross-reference them with your current map coordinates.
Aside from the main puzzle terminal, the office contains valuable resources including shotgun ammunition and a hidden safe. Exploring every corner ensures you do not miss the upgrade parts necessary to enhance your survival capabilities. Keep your eyes open for documents scattered around that provide deeper lore regarding the corporate operations during the outbreak.
Strategies for Eluding the Nemesis Pursuit
After you successfully restore power at the substation, returning to the control room becomes significantly more dangerous due to active pursuit. The relentless Nemesis monster will ambush you on your way back, forcing you to utilize the environment to escape. Relying on perfect dodges and explosive barrels along the path will buy you enough time to reach the safety of the office doors.
Fortunately, the interior functions as a reliable safe zone where the creature cannot follow you inside. Utilizing this geographical advantage allows you to catch your breath and solve the routing puzzle without constant physical threat. Once the transit lines are fully operational, your next task will be to backtrack safely to the main station platform.

Power To The People Bioshock Choice Guide And...
Exploring the dystopian city of Rapture requires players to constantly adapt their combat strategies to survive the aggressive splicers roaming the corridors. A crucial element of this survival strategy involves tracking down the rare Power to the People weapon upgrade stations scattered throughout the underwater ruins. Deciding which mechanical enhancements to prioritize shapes your tactical approach and directly impacts your efficiency during high-stakes resource encounters.
Understanding the Limitations of Station Choice
Every Power to the People station in Rapture operates as a strict single-use terminal that shuts down permanently after a single interaction. Because the total number of machines is finite, players cannot simply max out every weapon in their inventory during a single playthrough. This limitation forces you to make calculated decisions regarding which firearm upgrades best align with your preferred gameplay style.
For instance, investing early terminals into the pistol or shotgun completely alters how you manage localized skirmishes in the early districts. Conversely, saving these valuable opportunities for heavy weaponry like the grenade launcher ensures you can bring massive burst damage to late-game encounters. Reviewing your combat preferences beforehand helps prevent regret when encountering these stations in hidden corners of the map.
Evaluating Key Weapon Upgrade Pathways
Each weapon features unique upgrade paths that offer structural alterations, such as increased clip capacity, reduced recoil, or specialized elemental damage types. Upgrading the machine gun with recoil reduction drastically increases its accuracy during chaotic, mid-range combat scenarios against agile enemies. Meanwhile, adding damage boosts to the shotgun allows you to drop threatening targets quickly in close quarters.
For players who prefer tactical flexibility, upgrading the chemical thrower reduces fuel consumption rates significantly. This optimization allows you to freeze or ignite groups of splicers efficiently while saving precious ammunition for difficult boss encounters. Choosing utility modifications over pure damage can sometimes provide a much smoother journey through the deteriorating infrastructure.
The Long Term Tactical Consequences
Your choices at the upgrade terminals carry direct consequences for how you manage your finite inventory resources and wallet economy. Fully committing to a specific weapon path means you must actively scavenge for its corresponding ammunition to validate the upgrade investment. Neglecting alternative firearms might leave you highly vulnerable if your primary weapon runs completely dry during a massive ambush.
Furthermore, your weapon capabilities dictate how comfortably you can deal with elite targets like Big Daddies to protect or harvest Little Sisters. A poorly optimized arsenal requires much higher plasmid consumption, forcing you to expend valuable EVE hypos that could have been saved for later stages. Balancing your upgrades across both light and heavy weapons provides the most reliable safety net.
Strategic Tips for Tracking Stations
Many of the upgrade terminals are intentionally hidden behind environmental puzzles, locked doors, or heavily guarded security checkpoints. Thoroughly exploring optional rooms and listening to audio diaries often reveals clues regarding the exact placement of these vital machines. Rushing through the main narrative path will inevitably cause you to bypass several stations, lowering your endgame combat potential.
It is generally recommended to map out your intended upgrades based on the specific challenges present in upcoming districts. Keeping a mental checklist of the stations you have used ensures you maximize the efficiency of every zone before moving forward. With a fully upgraded arsenal at your disposal, conquering the final challenges of Rapture becomes a much more manageable feat.

Where Is The Impound Lot In GTA 5
Navigating the sprawling streets of Los Santos in Grand Theft Auto 5 can lead to plenty of chaotic adventures, but it also brings the risk of losing your favorite rides. When you abandon a customized vehicle or get busted by the police during a mission, your car is rarely lost forever. Instead, the game mechanics transfer it directly to a secure police garage where it awaits retrieval.
Finding the LSPD Auto Impound Location
The primary impound facility is situated within the bustling neighborhood of South Los Santos, specifically at the corner of Innocence Boulevard and Roy Lowenstein Boulevard. This location serves both the single-player story mode and the multiplayer chaotic streets of Grand Theft Auto Online. Players can easily spot the building on their radar, as it sits right next to the prominent Davis Police Station.
If you are exploring the map without an active waypoint, look for the white personal vehicle icon or a specialized tow truck marker near the central-southern highway channels. The property features a large fenced yard guarded by law enforcement personnel and a prominent gated entrance. Knowing this location saves you valuable time when trying to recover your heavily modified assets after a rough police chase.
How the Vehicle Recovery System Works
The game automatically reserves slots for your last driven vehicles, meaning the compound will store up to two cars at any given time. If you abandon a third vehicle while your previous ones are still held, the oldest asset in the queue will unfortunately be overwritten and permanently destroyed. Regularly clearing out your storage space ensures you never lose a rare ride to the digital void.
When a car is successfully impounded, a small notification pop-up will usually appear on the left side of your screen to confirm its status. In story mode, each protagonist shares the same physical location to pick up their respective personal transports. You can check the current status of your fleet by approaching the main gate and interacting with the retrieval menu.
Retrieving Your Car Peacefully or by Force
Players have two distinct choices when it comes to getting their set of wheels back from the authorities. The safest method involves walking up to the small green garage door marker and paying a standard administrative fee of two hundred and fifty dollars. This legitimate transaction instantly spawns your clean vehicle directly onto the public street outside without any negative consequences.
For those who prefer keeping their hard-earned cash, climbing over the rear fence and stealing the car back is always an option. However, entering the secure yard illegally triggers an immediate two-star wanted level, forcing you to evade active police units. Choosing this chaotic path requires a fast getaway plan to safely navigate the surrounding alleyways and lose the cops.

Egg Head Puzzle in Disco Elysium Explained
Disco Elysium is widely celebrated for its intricate narrative design and deeply philosophical world-building. Among the many memorable encounters in Martinaise, interacting with the ravers at the old church offers some of the most unique gameplay sequences. Understanding how to navigate the eccentric dialogue trees of Egg Head is essential for players looking to resolve the complex audio dilemmas of this group.
Who Is Egg Head in Disco Elysium
Egg Head is an enthusiastic member of the youth group attempting to establish a dance club inside the abandoned church. He communicates almost exclusively through fragmented electronic music lyrics and rhythmic shouts that can easily confuse an unprepared detective. Interacting with him requires patience and a high level of empathy to break through his intense auditory shell.
To successfully engage with this character, players must tune into his specific frequency rather than forcing conventional logic. His repetitive phrases often mask deeper emotional states and subcultural motivations. Deciphering his chaotic outward persona reveals a passionate individual dedicated to his artistic vision.
Solving the Audio Frequency Puzzle
The primary challenge involving Egg Head revolves around configuring the sound system to achieve the perfect audio balance. Players must assist the group in finding the right settings to make the club project viable. This process involves precise dialogue choices that match his frantic rhythmic energy perfectly.
Failing to match his enthusiasm will result in conversational dead ends that stall your investigation. Utilizing skills like Logic or Drama can provide unique insights into his unusual behavioral patterns. Once you align the technical equipment correctly, you unlock new progression paths within the church storyline.
The Cultural Significance of the Ravers
This specific side quest serves as a brilliant commentary on youth counterculture and artistic expression within a broken society. The ravers represent a desire for rebirth and collective joy amidst the bleak urban decay of Revachol. Helping them succeed provides a rare sense of hope and community development in an otherwise depressing environment.
The interaction highlights how unconventional subcultures find meaning through shared sonic experiences. By fixing their puzzle, the detective bridges the gap between authority and rebellious creativity. It remains one of the most rewarding narrative conclusions available in the entire game.

Who Really Ranks as Marvels Strongest Character
Determining who stands at the absolute peak of power in the Marvel Universe is a source of endless debate among comic book fans and casual readers alike. While heroes like Thor or the Hulk demonstrate incredible physical feats, true power in comic lore scales far beyond simple strength. The ultimate rankings belong to cosmic entities that embody entire dimensions of existence or manipulate reality at a foundational level.
The Omnipotent Peak of Existence
At the absolute top of Marvel's cosmic hierarchy sits The One-Above-All, the supreme entity representing the ultimate creator and authority across the entire multiverse. This entity possesses limitless power, omniscience, and omnipresence, operating above all abstract concepts, laws, and lesser deities. No character can surpass or defeat this entity because its authority defines the boundary of existence itself.
Directly beneath this supreme creator is the Living Tribunal, a singular multiversal judge who oversees balance across all alternate realities. Manifesting with three faces that symbolize equity, necessity, and vengeance, the Tribunal acts as an impartial arbiter when cosmic forces threaten reality. Its judgment ensures that no single entity or weapon disrupts the delicate harmony of the multiverse.
Beyond-Realm Entities and Reality Manipulators
Beyond the traditional cosmic order lie beings whose power stems from outside normal space and time. The Pre-Retcon Beyonder remains one of the most famous examples, possessing power that dwarfed the entire Marvel multiverse combined. Similar extra-dimensional forces remind readers that traditional cosmic rankings can be completely reshaped depending on the source of a character's power.
Characters like Owen Reece, known as Molecule Man, also hold unbelievable potential due to their ability to manipulate matter on a subatomic scale. Because his power connects directly to multiversal energy, Molecule Man has demonstrated the capability to reshape or restore entire realities with simple thoughts. His immense potential showcases how mortal origins can sometimes yield cosmic-level influence.
Abstract Embodiments and Universal Forces
Marvel also features abstract entities that represent physical and philosophical concepts essential to existence. Beings like Eternity, Infinity, Death, and Oblivion embody time, space, mortality, and non-existence across the universe. While incredibly powerful, these entities are tied to the existence of the universe itself and operate within specific functional boundaries.
Nexus forces such as the Phoenix Force further complicate the ranking by binding to mortal hosts and granting them near-limitless power. Exploring these abstract forces and cosmic hierarchies helps fans understand complex lore across various storylines. Ultimately, Marvel's power rankings depend heavily on context, narrative necessity, and whether a character operates within or outside the bounds of creation.
How To Max All Confidants In Persona 5...
Achieving a perfect run by maxing out every single Confidant in Persona 5 Royal is a highly rewarding challenge that requires careful planning. While the expanded definitive edition grants players significantly more free time compared to the original game, unlocking the ultimate potential of your entire social network still demands tactical daily scheduling. Balancing your phantom thief duties with school life and relationships requires a solid understanding of time management mechanics.
Prioritize Key Time Saving Relationships
To maximize your limited calendar days, you must focus heavily on specific characters who offer time-saving perks. Sadayo Kawakami, the Temperance Arcana, is arguably the most critical ally because her higher ranks allow you to perform personal tasks during class and unlock free evening slots after exploring dungeons. Securing these additional opportunities early in your playthrough drastically compounds the total amount of free time available before the game concludes.
Alongside Kawakami, establishing a strong bond with Chihaya Mifune of the Fortune Arcana is essential for an efficient run. Her unique affinity readings allow you to boost relationship points with other characters without wasting an actual afternoon or evening time slot. Utilizing this spiritual ability ensures you never spend a day hanging out with a friend unless they are ready to immediately rank up.
Optimize Dungeon Exploration and Social Stats
Efficiently managing your infiltration days is another fundamental element of completing a comprehensive run. You should always aim to complete palaces in a single calendar day as soon as they become available to minimize the time stolen from your social schedule. Leaving a dungeon halfway finished forces you to waste multiple afternoons that could otherwise be spent building bonds with your teammates.
Furthermore, managing your five core social stats efficiently is necessary to bypass the strict stat checks required by certain characters. Activities like reading books on the train, studying at the diner during rainy days, or taking major burger challenges provide huge stat boosts without wasting separate slots. Aligning these stat-boosting activities with the requirements of your locked relationships prevents unwanted progression bottlenecks during the mid-game arc.
Secure the Third Semester Requirements
Unlike the base game, Persona 5 Royal features a special third semester that requires specific relationship milestones to unlock. You must prioritize the Councillor Confidant, Takuto Maruki, and reach rank nine with him before the middle of November to access this extended story content. Failing to complete this academic bond will abruptly cut your playthrough short, making it completely impossible to max out the remaining characters.
Additionally, keeping close ties with Goro Akechi and Kasumi Yoshizawa opens up important narrative branches and additional gameplay days during the winter period. Maximizing these specific individuals guarantees you receive the maximum amount of calendar days to finish off any lagging social links. By following a strict priority list and utilizing your evening slots wisely, maxing out your entire team becomes an achievable feat.

Yakuza Kiwami 2 Cabaret Club Complete Guide
The Cabaret Club Grand Prix returns in Yakuza Kiwami 2, offering players a deep and addictive management simulation within the bustling district of Sotenbori. Managing Club Four Shine requires strategic planning, a strong roster of hostesses, and sharp reflexes during active gameplay shifts. Fulfilling the needs of demanding guests will quickly boost your club profits and push you ahead in the league standings.
Mastering Hostess Management and Styling
Building a successful team begins with scouting talent across the city through substories or recruiting new hostesses directly at your venue. Each hostess possesses distinct stats and appearance traits that appeal to different customer preferences. You can customize the look of your Platinum hostesses through diverse makeup, clothing, and accessory changes to maximize their stats. Finding the right balance of appearance bonuses helps satisfy high-profile clients much more efficiently.
Regular training sessions are essential to prepare your top earners for the major tournaments. These interactions improve their special skill levels and increase their overall stamina for longer shifts. Keeping your roster healthy ensures they do not burn out during critical competitive events.
Navigating the Grand Prix Leagues
The core progression structure tasks you with defeating rival venues across several distinct competitive leagues. You will face unique challenges in the Fresh League, Paradise League, Executive League, and Millionaire League before hitting the finals. Every league matches you against a specialized champion club that will activate unique business disruptions to hinder your shift. Reaching the pinnacle of the Sotenbori nightlife requires winning these direct showdowns one by one.
Earning fans in specific districts is the primary way to unlock access to these major tournament challenges. You can rapidly increase your local fan base by running normal shifts and keeping customers completely satisfied. Achieving victory in these rival matches rewards you with massive revenue boosts and top-tier hostess unlocks.
Understanding Guest Requests and Hand Signs
During active club hours, hostesses will frequently signal you using distinct hand gestures to ask for immediate assistance. Recognizing these silent hand signs instantly allows you to replenish guest drinks, provide clean towels, or swap out dirty ashtrays. Responding quickly keeps client satisfaction high and triggers lucrative fever time events for your tables. Missing these visual cues can quickly ruin a guest's mood and lower your overall shift rating.
Paying close attention to customer attributes before assigning hostesses ensures higher initial satisfaction rates. Matching a guest's explicit desire for specific hostesses maximizes your earnings potential during their stay. Successful service directly impacts your overall score and helps you dominate the business leaderboards.
Maximizing Profits and Extending Shifts
When a customer's time at a table expires, you are presented with options to maximize your financial returns. Offering expensive gifts or asking them to extend their stay can significantly increase your total payout if their satisfaction is high. However, pushing for an extension when a guest is unhappy might cause them to leave angrily without giving a bonus tip. Discerning when to play it safe or take a gamble determines how fast you can accumulate major wealth.
Fever time mechanics act as your ultimate weapon to generate massive financial windfalls during tournament play. Activating this state sends multiple tables into an absolute spending frenzy, ignoring normal stat limitations entirely. Saving your fever activations for high-paying VIP sections ensures the highest possible score returns.

Assassin's Creed Odyssey Legendary Armor Locations
Hunting down the legendary armor sets scattered throughout Ancient Greece remains one of the most rewarding pursuits in Assassin's Creed Odyssey. Each set offers powerful stat bonuses and visual changes that can entirely reshape your preferred combat style. Players who take the time to gather these pieces will find themselves much better equipped to face the endgame challenges.
Hunting the Cult of Kosmos Branches
The vast majority of legendary armor sets are directly tied to defeating branches of the Cult of Kosmos. Every individual cultist you eliminate drops a single piece of a specific set, meaning you must wipe out an entire branch to complete it. For example, defeating the Eyes of Kosmos branch will grant you the full Snake Set, which heavily amplifies your poison abilities.
Other branches offer equally valuable gear tailored for aggressive warriors or master marksmen. Eliminating the Heroes of the Cult branch rewards players with the Achilles or Amazon set, providing vital health regeneration during intense combat encounters. Tracking these targets down requires exploring distant regions and analyzing hidden clues found across the map.
Defeating Mythical Creatures and World Bosses
Aside from tracking down shadowy cultists, players can claim unique legendary armor by tracking down monstrous mythical beasts. Completing specific long-form questlines will pit the player against legendary targets like the Minotaur or the Nemean Lion. These encounters serve as ultimate tests of your combat capabilities and mechanical mastery.
Surviving these historic encounters rewards you with items that boast unparalleled individual combat perks. For example, completing the extensive Daughters of Artemis hunt storyline unlocks the full Master Artemis set, which dramatically enhances hunter damage. These specialized fights demand proper gear preparation and careful observation of enemy attack patterns.
Unlocking Sets Through Arena and World Activities
Some of the most powerful visual sets in the game are earned by participating in regional activities rather than story milestones. The Pephka Arena allows players to fight waves of unique champions to earn the respected Fighting Arena set. Testing your mettle in the arena is an ideal way to quickly gather high-tier gear while testing new builds.
Additionally, keeping an eye out for high-level mercenaries wandering the map can yield surprising gear drops. Certain high-ranking mercenaries carry pieces of the Greek Hero set, which greatly boosts your defensive capabilities. Balancing your journey between structural story quests and dynamic world exploration ensures a constant stream of high-quality armor upgrades.

FF16 The Breaker Of Worlds Location And Hunt...
Final Fantasy 16 introduces players to a wide variety of formidable foes through its unique Hunt Board system. Among the most challenging targets available is the notorious S-Rank mark known as Atlas, also titled the Breaker of Worlds. Tracking down this ancient relic enemy requires careful preparation, sharp reflexes, and a deep understanding of late-game combat mechanics.
Unlocking the Hunt Board Bounty
Before you can set out to find this ancient giant, you must progress significantly through the main narrative of the game. The Breaker of Worlds bounty becomes officially available on the Hunt Board during the Out of the Shadow main story quest line. Checking the tavern in the Hideaway will reveal the vague whispers regarding a massive mechanical threat devastating the countryside.Unlike lower-tier marks, S-Rank hunts do not give you the exact map marker locations on your quest log immediately. Instead, players are required to read the descriptive clues provided by the bill to deduce where the monster rests. This mechanic rewards thorough exploration and adds a traditional role-playing element to the tracking experience.
Finding the Breaker of Worlds Location
To pinpoint the resting place of Atlas, players need to fast travel over to the imperial province of Rosaria. You should specifically select the Martha's Rest obelisk as your starting point to minimize the travel distance across the map. From the settlement, head out through the northern gates and venture deep into the surrounding wilderness.
Keep moving towards the easternmost edge of the map until you reach a secluded sub-region known as Cressida. Follow the narrow winding pathway down to the circular, dead-end ruins located at the far end of this zone. As you approach the clearing, the massive iron giant will drop down from the sky to trigger the boss fight.
Combat Strategies and Boss Mechanics
Atlas represents a massive spike in difficulty compared to the enemies you face during standard story missions. The giant wields an enormous glowing energy blade that gives its sweeping physical attacks an incredibly wide horizontal range. It is absolutely crucial to time your precision dodges perfectly to avoid taking severe chunks of health damage.
During the secondary phase of the battle, the Breaker of Worlds will begin raining magical projectiles from the sky. Watch the ground indicators carefully to stay out of the tracking circles while maintaining an offensive stance. Utilizing high-stagger Eikonic abilities will help deplete the boss's will gauge and open windows for massive damage combinations.
Claiming Your S Rank Rewards
Defeating this ancient war machine grants Clive a substantial amount of experience points and character progression resources. Players will also receive a massive payout of Gil and Renown points to spend back at the Hideaway vendors. These resources are essential for purchasing high-tier weapon blueprints and valuable accessories.
Most importantly, completing the hunt rewards you with rare crafting materials like Fallen Iron and Orichalcum. These components are mandatory ingredients for forging the absolute strongest equipment available in your initial playthrough. Taking the time to conquer this fight early gives you a significant defensive advantage for the remaining chapters of the story.

Gojo Vs Sukuna Manga GIF Battle Comparison And...
The monumental clash between Satoru Gojo and Ryomen Sukuna stands as the absolute pinnacle of modern manga history, capturing the attention of millions worldwide. As chapters unfolded week by week, the internet became flooded with community-made animated loops that condensed complex panel sequences into hyper-dynamic visual summaries. These micro-narratives transformed static comic pages into fluid spectacles, giving fans a completely new medium through which to analyze tactical exchanges and cursed techniques.
The Evolution of Manga Battle Animations
For years, anime enthusiasts relied strictly on official studio adaptations to see their favorite comic pages spring to life. However, the rise of sophisticated digital editing tools allowed independent artists to animate complex combat sequences directly from fresh chapter scans. By isolating characters and adding artificial camera pans, creators generated looping clips that highlighted the raw kinetic energy of the source material.
These custom graphics do more than just replicate the original illustrations; they enhance the pacing of high-stakes martial arts exchanges. Seeing Gojo utilize his Limitless technique alongside Sukuna wielding Cleave within a seamless sequence provides instant clarity to chaotic choreography. Consequently, the fandom experienced a massive surge in engagement as these visual highlights circulated across social media platforms.
Analyzing the Core Choreography and Technical Execution
When comparing different online animations, the variations in visual style and frame rate significantly alter how fans perceive the overall flow of combat. Some creators focus heavily on maintaining the clean line art of the original author, adding subtle motion blurs to accentuate sudden movements. Other animators choose to introduce custom colored lighting, applying a distinct red tint whenever the King of Curses gains an advantage in domain refinement.
These artistic decisions help viewers grasp the immense scale of the battle, especially during the intricate Domain Expansion clashes that defined the opening stages. By translating sequential panels into continuous motion, the clips reveal exactly how simultaneous attacks landed. This micro-storytelling method proves incredibly useful for understanding fast-paced exchanges that might initially seem confusing on paper.
Narrative Importance and Deep Power Scaling Context
Beyond the impressive aesthetic appeal, these looping battle sequences serve as crucial reference points for intense power scaling debates within the community. The historical narrative context behind this fight involves the two strongest sorcerers fighting to decide the ultimate fate of the Jujutsu world. Analyzing specific loops allows fans to measure exact reaction times, physical strength feats, and tactical decision-making processes under extreme duress.
Many viewers note that these visual aids offer a balanced perspective on how close the combatants truly were throughout the entire confrontation. Seeing the back-and-forth movement in a continuous loop minimizes the recency bias often caused by weekly cliffhangers. This comprehensive view helps readers appreciate the strategic maneuvering involved rather than focusing solely on the final outcome.
The Growing Impact of Digital Communication on Fan Culture
The widespread sharing of combat animations fundamentally changes how global audiences consume and discuss ongoing manga releases. Instead of reading text summaries, modern fans use dynamic graphic loops to communicate complex thoughts, emotional reactions, and thematic concepts instantly. This shifts the community experience toward a more visual and shared form of journalism where imagery takes center stage.
As digital media continues to evolve, these compressed visual formats will likely remain primary tools for discussing mainstream pop culture events. They successfully bridge the gap between static print and fully produced anime adaptations, keeping interest at an all-time high. Ultimately, the creative output surrounding this legendary duel showcases the passion and technical skill present within modern internet communities.

Game Of Thrones Sword Names And Their Most...
The epic fantasy world of Westeros is defined by its deep lore, political intrigue, and legendary weaponry that shapes the fates of noble houses. Among these armaments, blades forged from Valyrian steel carry unmatched prestige, carrying unique identities that reflect the histories of their legendary handlers. Exploring the narratives behind these famous tools reveals how closely bound a warrior's legacy is to the weapon they wield in battle.
The Legacy of Ice and the Stark Family
Ice was the massive Valyrian steel greatsword belonging to House Stark, serving primarily as a ceremonial weapon for executions rather than regular combat. Lord Eddard Stark famously used it to dispense justice in the northern territories before the political turmoil pulled his family into war. The blade represented the harsh but fair honor of the North, making its eventual destruction a major turning point in the series.
Following the tragedy in King's Landing, Tywin Lannister ordered the giant heirloom to be melted down to create new weapons for his own bloodline. This act symbolised the temporary downfall of northern influence and the fragmentation of the Stark family legacy across the continent. The remnants of this legendary steel would go on to carve out entirely new stories in the hands of unexpected heroes.
Oathkeeper and the Honor of Brienne of Tarth
Born from the molten remains of Ice, Oathkeeper was initially gifted to Jaime Lannister before he passed it along to Brienne of Tarth. Jaime bestowed the beautifully adorned blade upon her to fulfill a sacred promise to protect the surviving Stark daughters. Brienne carried this heavy responsibility across the war-torn kingdoms, proving herself worthy of the weapon's noble designation.
Her journey with the sword highlighted how true knighthood is defined by actions rather than official titles granted by a corrupt crown. The weapon participated in numerous crucial defensive engagements, preserving the lives of those who would eventually rebuild the fractured realm. Through her unwavering loyalty, the sword regained the honor that had been stripped away when it was stolen from the North.
Longclaw and the Rise of Jon Snow
Longclaw was the ancestral bastard sword of House Mormont, originally meant for Jorah Mormont before his exile led him away from his heritage. Jeor Mormont, the Lord Commander of the Night's Watch, kept the blade until he chose to pass it down to Jon Snow as a reward for saving his life. The pommel was subsequently modified from a bear to a white wolf to fit Jon's distinct identity.
This particular weapon became essential during the desperate battles against the unnatural forces threating the realm from beyond the Wall. Jon used its exceptional properties to defeat terrifying adversaries that normal steel could never hope to pierce or damage. Longclaw stood as a symbol of leadership, bridging the gap between old traditional houses and the survival of all living men.
Needle and Arya Stark's Journey
Unlike the heavy military armaments of the great houses, Needle was a slender sword designed specifically for quick, agile thrusting maneuvers. Jon Snow commissioned the weapon as a parting gift for Arya Stark before they both left their ancestral home of Winterfell. It perfectly matched her fierce spirit and unconventional approach to overcoming much larger opponents.
Throughout her dangerous travels across the world, this small blade remained Arya's primary link to her identity as a true daughter of the North. Even when forced to abandon all personal belongings to learn the art of stealth, she hid Needle securely away. It eventually returned to her side to exact vengeance against those who had brought ruin to her family.

The Search For Truth Dead Island 2 Complete...
Navigating the sun-soaked, zombie-infested streets of HELL-A requires more than just raw firepower and quick reflexes. In Dead Island 2, the main story campaign leads players through numerous complex investigations, none more crucial than the late-game main quest centered around uncovering hidden conspiracies. This comprehensive walkthrough provides the essential steps and locations needed to successfully complete this challenging narrative checkpoint.
Beginning the Investigation in Venice Beach
The journey kicks off within the coastal zone as players attempt to track down Tisha and uncover what the mysterious OSK tech group is hiding. You must first navigate toward the localized lab facilities while avoiding aggressive apex variants patrolling the area. Clearing the perimeter allows you to access the primary terminal hidden deep inside the compound.
Once inside, players need to interact with various environmental elements to bring the facility back online safely. Finding the specific keycards involves searching the nearby offices while fending off sudden environmental hazards. Completing this initial phase sets up the broader mystery that defines the rest of the campaign.
Locating the Crucial Evidence Pieces
Uncovering the full conspiracy requires collecting specific documents scattered across the laboratory tables and server rooms. The first critical piece of evidence is tucked away near a deactivated terminal behind a heavy security door. Players must carefully inspect the glowing items to ensure no valuable audio logs or text files are missed during the chaos.
The second major clue requires solving a brief power grid puzzle in the adjacent warehouse structure. Restoring electricity reveals hidden files that expose the dark biological testing conducted beneath the city. Collecting all pieces is mandatory before the main console will allow you to proceed further into the storyline.
Overcoming the Lab Security Defenses
After compiling the necessary documentation, a sudden lockdown activates the facility automated containment protocols. Players must survive multiple waves of reinforced walkers, including volatile runners and armored flesh-menders. Utilizing the environmental oil slick traps and electric panels makes managing these crowded corridors much easier.
Once the final wave is defeated, the lockdown lifts and grants access to the extraction point outside. You can then regroup with your allies to discuss the horrific findings and plan the final assault. Successfully completing this mission unlocks powerful endgame weapon upgrades and high-tier mod blueprints.

Super Mario Odyssey Cap Kingdom Moons All Moon...
Super Mario Odyssey takes players on an extraordinary journey across diverse worlds, starting in the monochromatic and atmospheric Cap Kingdom. Known as Bonneton, this tutorial region introduces players to Cappy and the fundamental mechanics of capturing enemies to explore the environment. While it serves as the introductory level, it holds a surprising number of hidden secrets that require players to revisit the area later in the game.
Finding the Initial Power Moons in Bonneton
When you first arrive in the Cap Kingdom, your access to collectibles is limited as you learn the basic controls. However, returning after completing the main story unlocks the full potential of the region, revealing a total of 31 Power Moons scattered across the foggy landscape. Early exploration involves capturing a frog to jump to high ledges and searching the top of the distinctive Top Hat Tower.
Several standard moons are hidden in plain sight, such as those floating above the hat-shaped houses or tucked behind local structures. Players should meticulously examine every corner of the main square to ensure no obvious collectibles are overlooked. Capturing specific creatures like the Paragoomba allows you to fly across large gaps and reach isolated platforms safely.
Unlocking Hidden Sub Areas and Challenge Rooms
Beyond the surface level of Bonneton, players can discover several hidden doors that lead to tricky platforming challenges. These sub-areas often require precise movement skills and creative use of captured enemies to reach the end. For instance, the poison tide room forces players to navigate changing terrain using a flying creature while avoiding deadly hazards.
Each of these secret rooms contains two separate collectibles, with one usually hidden off the main path to reward thorough exploration. Finding the hidden block puzzle room requires keen observation, as the entrance blends seamlessly into the craggy walls of the kingdom. Navigating these challenges successfully provides a significant boost to your total moon count.
Locating Post Game Moon Shards and Toads
After defeating the final boss of the main campaign, a massive Moon Rock drops into the Cap Kingdom, waiting to be shattered. Breaking this rock releases a new set of glowing objectives across the entire map, extending the life of the level significantly. Players must re-explore the familiar layout to track down these newly added challenges.
Additionally, a music-loving Toad arrives in the area, requesting a specific track from the game's expansive soundtrack to reward you with a prize. You can also spot a stray Hint Toad and a resident Koopa Troopa who offers a fast-paced tracking race across the rooftops. Engaging with these friendly characters provides unique gameplay variations that contrast nicely with the standard exploration elements.

Borderlands Pre Sequel Golden Keys Latest Shift Codes...
Borderlands The Pre-Sequel continues to captivate players with its low-gravity combat and unique planetary mechanics across Elpis. Unlocking rare tactical gear can significantly improve your survival chances against tough moon bosses and aggressive scavengers. Utilizing promotional developer tokens offers a reliable shortcut to obtaining powerful shields, rare class mods, and high-tier purple firearms.
Understanding the SHiFT Code Mechanism
The SHiFT system functions as a cross-game promotional platform built directly into the Borderlands ecosystem by Gearbox Software. Players can acquire multi-use coupons distributed through official social media broadcasts, special gaming events, and community streams. These dynamic strings allow vault hunters to instantly claim specialized rewards without grinding through repetitive open-world encounters.
While traditional cheat codes modify local system files, this online network safely communicates directly with the developer architecture. This unified connection guarantees that your digital unlocks remain completely secure and bound to your universal profile. It provides a balanced way to acquire valuable gear configurations while preserving the core integrity of the combat balance.
How to Redeem Active Key Vouchers
Players can process their active promotional strings using two primary verification paths depending on personal preference. The quickest digital method involves opening a web browser and logging directly into the official web portal. Once your console accounts are linked, copying the active sequence into the redemption panel applies the rewards globally.
Alternatively, the classic method allows users to handle the process directly inside the main game interface. Navigating to the extras section of the main selection menu exposes the dedicated network portal configuration screen. Inputting the character sequence triggers a confirmation message from the central network validation engine.
Locating the Concordia Golden Chest
After successfully validating your promotional vouchers, the digital items must be manually collected from the central hubs. Vault hunters need to travel to the futuristic settlement of Concordia and look across from the main elevator structure. The glowing storage container requires exactly one single-use token from your profile inventory to trigger its internal mechanical components.
The items generated within this container dynamically scale to match the exact level of the vault hunter initiating the open command. Opening the storage locker during your early campaign provides a significant power jump during difficult introductory missions. However, saving your inventory tokens until reaching the maximum leveling tier guarantees top-tier endgame equipment.
Maximizing Gear Value and Progression
Relying solely on golden chests can limit your exposure to unique legendary items that drop exclusively from specific bosses. True optimization requires balancing temporary chest rewards with targeted farming routes across the moon surface. Mixing powerful purple gear with optimized shield components creates highly effective character builds for high-difficulty runs.
Managing your inventory distribution across multiple characters also allows secondary profiles to benefit from high-tier weapon rolls. Since these digital rewards are shared across your entire profile profile registry, any character can access the central inventory pool. This flexibility makes trying out new vault hunter classes far more efficient and entertaining.

Why Does Elden Ring Keep Crashing
Elden Ring remains one of the most celebrated action role-playing games in recent history, but its journey on PC hasn't been entirely smooth. Many players frequently find their journeys through the Lands Between cut short by sudden and frustrating desktop crashes. Understanding the root causes of these stability issues can help you implement the right fixes and return to your adventure.
The Core Culprits Behind PC Instability
One of the primary reasons for frequent performance drops and sudden shutdowns relates to how the game handles asset compilation. The integration of DirectX 12 often triggers significant shader compilation stutters that can occasionally overload specific system configurations. When the graphics engine fails to load a specific zone asset rapidly enough, the entire client can unexpectedly force close.
Outdated graphics drivers are another common source of software conflicts that terminate active gaming sessions. Hardware manufacturers frequently release optimized updates specifically designed to manage complex open-world engines smoothly. Running the game on older driver versions increases the likelihood of system resource conflicts during intensive combat encounters.
Verifying Game Files and Software Interactions
Corrupted installation files frequently cause game clients to shut down at specific loading screens or regional boundaries. Steam provides a built-in verification tool that compares your local installation files against the official repository databases. Repairing these mismatched assets ensures that essential files load correctly without triggering critical stability errors.
Background applications and third-party software overlays can also actively disrupt your gameplay stability. Programs running aggressive hardware monitoring or customized overlay interfaces can conflict directly with FromSoftware's engine. Disabling these non-essential tools before launching your session frequently alleviates the sudden desktop closures.
Optimizing Hardware Settings for Better Stability
Aggressive system overclocks can introduce subtle instability that only manifests during prolonged, resource-heavy gaming sessions. Resetting your graphics card and processor to their default factory frequencies can instantly solve stubborn crashing loops. Providing a stable power and thermal environment allows the application to run smoothly without triggering safety faults.
Adjusting specific in-game settings downward can dramatically reduce the overall strain placed on your physical hardware. Lowering texture quality and disabling heavy secondary effects like ray tracing minimizes sudden spikes in video memory consumption. Maintaining a conservative resource overhead prevents the system from running out of memory during crowded battles.

How Do You Get Coal in Palworld Fastest...
Palworld tasks players with gathering an array of vital resources to upgrade their bases and create advanced survival gear. Among these late-game materials, coal stands out as an absolute necessity for manufacturing refined ingots and high-tier weaponry. Knowing exactly where to look on the vast map will save you hours of aimless wandering and accelerate your progression significantly.
Top Mining Locations in the Desert Biome
The vast desert region located in the northern portion of the map stands out as the absolute best area for finding coal nodes. Specifically, the high-altitude cliffs near the Anubis boss fight host several densely packed nodes that reset regularly. Setting up a secondary base in this vicinity allows your pals to continuously harvest the nodes without constant manual labor.
Another exceptional spot is situated near the PIDF Tower fast travel checkpoint, where numerous nodes sit close together. This elevated position provides natural defense against raiding parties while offering a regular yield of heavy materials. Navigating these dry regions requires heat-resistant armor to avoid taking passive environmental damage during daylight hours.
Densely Packed Nodes in the Verdant Hills
For players who prefer less hazardous environments, a renowned mountaintop location at coordinates 191, -38 provides an ideal compromise. This specific peak features a rare combination of eight ore nodes and six coal nodes situated in a compact circle. The steep cliffs offer total immunity to land-based enemy invasions, making it a perfect spot for automated resource gathering.
Utilizing a flying mount is highly recommended for reaching this summit efficiently since climbing on foot drains stamina rapidly. Assigning pals with high mining skills, such as Digtoise or Reptyro, guarantees that the nodes are cleared out completely every single day. This strategic placement ensures a steady supply of basic metals alongside your advanced charcoal alternatives.
Essential Gear and Mounts for Heavy Hauling
Before embarking on a dedicated mining expedition, you must prepare the correct equipment to manage the extreme weight. Crafting a high-quality metal pickaxe vastly increases the damage dealt to each deposit, reducing the time spent swinging at individual rocks. Carrying multiple weight-boosting accessories will also prevent your character from becoming completely immobilized by a full inventory.
Bringing specific companion creatures along can alter your carrying capacity and speed up the travel time between faraway nodes. For instance, traveling with Cattiva or Broncherry in your active party provides a passive bonus to your maximum inventory limits. Utilizing these tactical preparations transforms a tedious chore into a highly efficient and fast-paced farming routine.
Automating Your Material Production Lines
Maximizing your efficiency requires transitioning from manual labor to a fully automated system managed by capable base companions. Constructing a pal box directly next to a cluster of nodes permits immediate storage without walking long distances. Ensuring your helpers have sufficient food supplies and comfortable beds keeps their sanity levels high for uninterrupted work.
Once the raw materials are collected, you will need to process them inside an advanced electric furnace. Pairing the gathered minerals with standard ore produces the highly coveted refined ingots needed for rocket launchers and pal metal armor. Establishing this automated pipeline secures your survival success and allows you to focus on exploring the remaining mysteries of the islands.
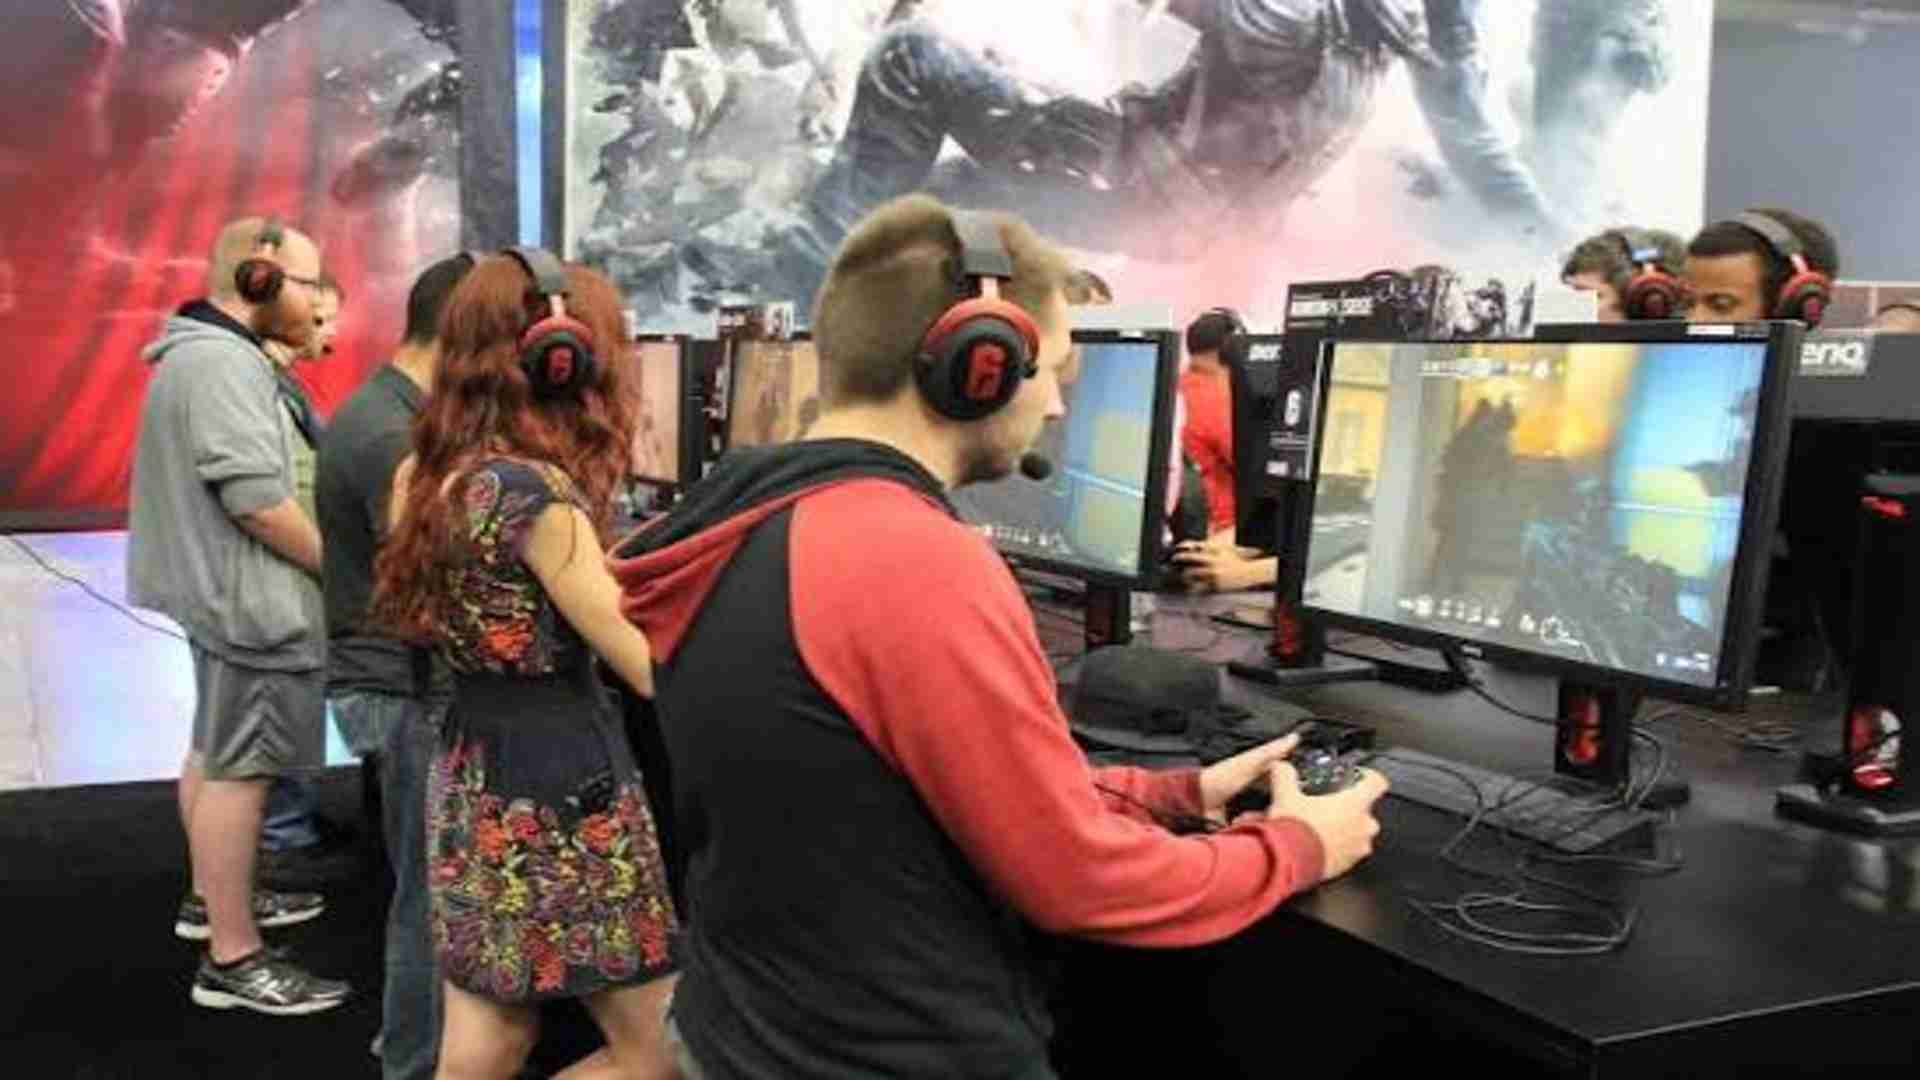
Collectible Mobile Card Games Explained
The global phenomenon of mobile gaming has transformed traditional hobbies into easily accessible digital experiences. Among the fastest-growing genres is the collectible mobile card game, which combines the excitement of collecting rare items with the intense strategy of tactical duels. Players worldwide now build virtual decks, challenge opponents in real time, and manage expanding digital collections right from their smartphones.
The Core Appeal of Card Collecting
At the heart of these games lies the psychological thrill of ownership and completion. Players earn or purchase booster packs to uncover cards of varying rarities, each featuring unique artwork and specialized abilities. This constant pursuit of elusive, high-tier cards keeps the community highly engaged and deeply invested in the experience.
Unlike physical trading cards, digital collections are immune to wear and tear and can be organized instantly. For enthusiastic gamers looking to explore seamless digital platforms, accessing an optimized portal like the m88 link mobile network can provide a reliable entry point to diverse interactive features. Managing an expanding library of capabilities allows players to constantly reinvent their personal gameplay style.
Strategic Deck Building Mechanics
Success in collectible mobile card games relies heavily on preparation before the match even begins. Players must select a limited number of cards that interact well together to form a cohesive, synergistic deck. Balancing low-cost resource cards with powerful late-game finishers is a fundamental skill that separates novices from experts.
Most titles implement resource constraints, such as mana or energy systems, to prevent players from using powerful abilities too quickly. This setup forces participants to plan multiple turns ahead and anticipate potential counterplays from their opponents. A well-constructed deck reduces reliance on luck and maximizes options during critical match moments.
The Evolutionary Digital Competitive Scene
Modern mobile platforms have elevated the genre by introducing automated rule enforcement and instant global matchmaking. Players no longer need to find local clubs to test their skills, as they can join competitive ranked ladders within seconds. Regular balancing patches also ensure that no single deck structure dominates the meta-game for too long.
Furthermore, seasonal events and community tournaments offer continuous incentives for players to refine their strategies. Developers frequently introduce expansions that add entirely new mechanics, keeping the tactical ecosystem fresh and unpredictable. This continuous evolution guarantees that the intellectual challenge remains exciting for long-term participants.